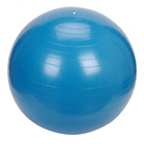
 In a previous post, we learned to strengthen our upper bodies using Pilates stability ball exercises. Now it is time to create mobility and fluidity in the upper body. The stability ball lends itself magnificently to opening exercises because it is round and pliable so we can move the energy in a fluid manner.
During all of these exercises, make sure the ball does not overpower you and take you past where you should go. As always, move consciously, slowly, and with free breathing. No restrictions.
Exercise: ARCH AND CURL WITH THE STABILITY BALL
• Start seated at the end of the mat facing in with the ball in front of you.
• If you are able, sit on your heels with the knees open. If not, sit in a comfortable cross-legged position.
• Inhale and arch the spine while pushing the ball forward with long arms. When going into this arched position, the eyes should travel upwards.
• Exhale and curl, pulling the ball back toward the body. The elbows may slightly soften.
• The eyes travel down with the curled position of the spine.
• As you move in and out, make sure the spine (and not the arms) is leading the motion.
• Also try to keep the behind down as you arch and curl.
• Do 6 to 8 reps.
Exercise: MERMAID
• Start seated on the left end of your mat with the ball to your right side.
• Start seated tall, the left arm extended to your side with the left palm up and the right palm resting on the stability ball.
• Inhale and side bend to the right as the left arm goes over the head.
• Both sitting bones should stay anchored and the right arm (the one on the ball) stays straight and connected into the mid-back (no ears up to the shoulders).
• Exhale, reach a bit more into the side bend, and then slowly travel back to the starting position.
• Do 2 to 4 reps.
ADD ON ROTATION
• Inhale and side bend to the right as the left arm goes over the head.
• Exhale and rotate the upper body so both hands try to reach the ball and the eyes are facing toward the floor.
• Try to keep the pelvis square to the front as you rotate.
• Inhale and rotate back to the forward side bend with the left arm over the head.
• Exhale, reach a bit more into the side bend, and then slowly travel back to the starting position.
• Do 2 to 4 reps.
• Change sides.
Exercise: KNEELING PRAYER
This one helps to open up in the armpits, through the breast tissue, and into the chest.
• Kneel on your mat with the ball in front of you.
• Bring the elbows to the top of the stability ball, hands together and fingertips pointing to the ceiling.
• Lower the head so the eyes are to the floor, ears between the arms, and shoulders in line with the hips.
• If it feels comfortable in the shoulders, you can push the ball away just a bit more to get extra length.
• If you are feeling too off balance, place the ball against a wall.
• You can hold this position for 20 to 30 seconds and then rest in Child’s Pose.
• Remember to use your long, tension-free breath.
Exercise: BACKBEND, BEGINNER AND ADVANCED WITH STABILITY BALL
For the beginner version, start with the ball at the wall.
• Sit in front of the ball in a comfortable crossed-legged position.
• Inhale and reach the arms upward in a high V position as you arch back over the ball.
• If comfortable, you can rest the head back on the ball. If your ball is not big enough for you to comfortably set your head down, place a small pillow at the top of your ball.
• Exhale and slowly start to circle the arms down as the chin rolls toward the chest and you come back to a seated position.
• Remember that you don’t have to rest the head all the way back. Just keep the wrinkles out of the back of the neck as you extend.
• Keep lengthening on all sides of the body as you extend.
• Do 2 to 3 reps and then rest in Child’s Pose.
For a more advanced position, start sitting on top of your ball.
• Exhale and slowly bring the tailbone under as you walk the legs out and slowly extend the back over the ball.
• Use as many breath cycles as you need to find this position.
• Move slowly.
• Once extended over the ball, place the palms on the floor with the fingertips facing into the ball.
• Inhale and press into the palms, lengthening the arms and taking some weight off the ball.
• Hold here, cycling the breath. Make sure the neck is relaxed.
• After 10 to 20 seconds, exhale and start to roll the chin toward the chest as the feet walk back toward the ball and you come up into the seated position on the ball.
• Again, take as many breath cycles as you need to come back into the starting position.
• Do 1 to 3 reps and then drape your front side over the ball, relaxing the head and neck completely.
~ by Jennifer Gianni
We hope you enjoy these exercises! Tell us what you thought below.
